Sono affiliato Amazon, se decidi di comprare l’oggetto passando dal mio link io riceverò un compenso da Amazon. Tuttavia la mia recensione resta imparziale, questo non è un canale che vive sulla pubblicità ma il tuo aiuto contribuisce a creare altri contenuti a tema in futuro.
In questo articolo vedremo come installare e configurare il firewall Partaker

Dati tecnici del modello scelto:
Model Number: H7-A
Version: Built-in silent fan for cooling
Processor: Intel Core i3-1115G4 Processor, 6M Cache, up to 4.10 GHz
Graphic: Intel UHD Graphics
Memory: 2 x DDR4 3200 MHz SODIMM memory slots, up to 64GB
Storage: 1 x M.2 NVME 2280, 1 x 2.5-inch HDD
NIC: Intel I225/I226 2.5G adaptive network card interface
USB: 2 x USB3.0, 2 x USB2.0
Ports: 4 x 2.5G LAN, 1 x RJ45_COM, 1x Power Adapter Interface, 1xLED, 2 x USB2.0, 2 x USB3.0, 1xHDMI (with audio output)+DP, 1x power button, 1xSIM card slot
Display: HDMI/DP, support dual display
Expansion Slot: Support 1 x MINI PCIE channel (can be WIFI/Bluetooth/4G)
BIOS: AMI EFI BIOS
Size: 178*126*56mm
Net Weight: 1-1.5KGs
Working Enviroment: -20°C~70°C (32°F~140°F)
Relative Humidity: 5%~85%
Shell Material:Aluminum alloy shell
Function:Support Auto Power On, RTC, PXE, WATCHDOG, boot, Wake-on-LAN, etc
System: WIN 10/ WIN 11/ pfSense /OPNsene, pfSense as default system, GNU/Linux
Standard:1xMini PC +1xPower Adapter +1xPower Cord +1xSATA Cable +1xScrews Bag
Ambito di applicazione
Il firewall in oggetto opera in una rete di un piccolo ufficio, segmentata in diverse VLAN.
L’infrastruttura è composta da un piccolo datacenter, delle postazioni fisiche (PC, notebook) e due reti wi-fi, una guest e una per i dipendenti.
Nel mio caso la scelta è ricaduta su una configurazione basata su CPU Intel i3 11° generazione, con 8GB RAM e 128GB SSD. Un modello economico ma che offre delle interessanti possibilità.
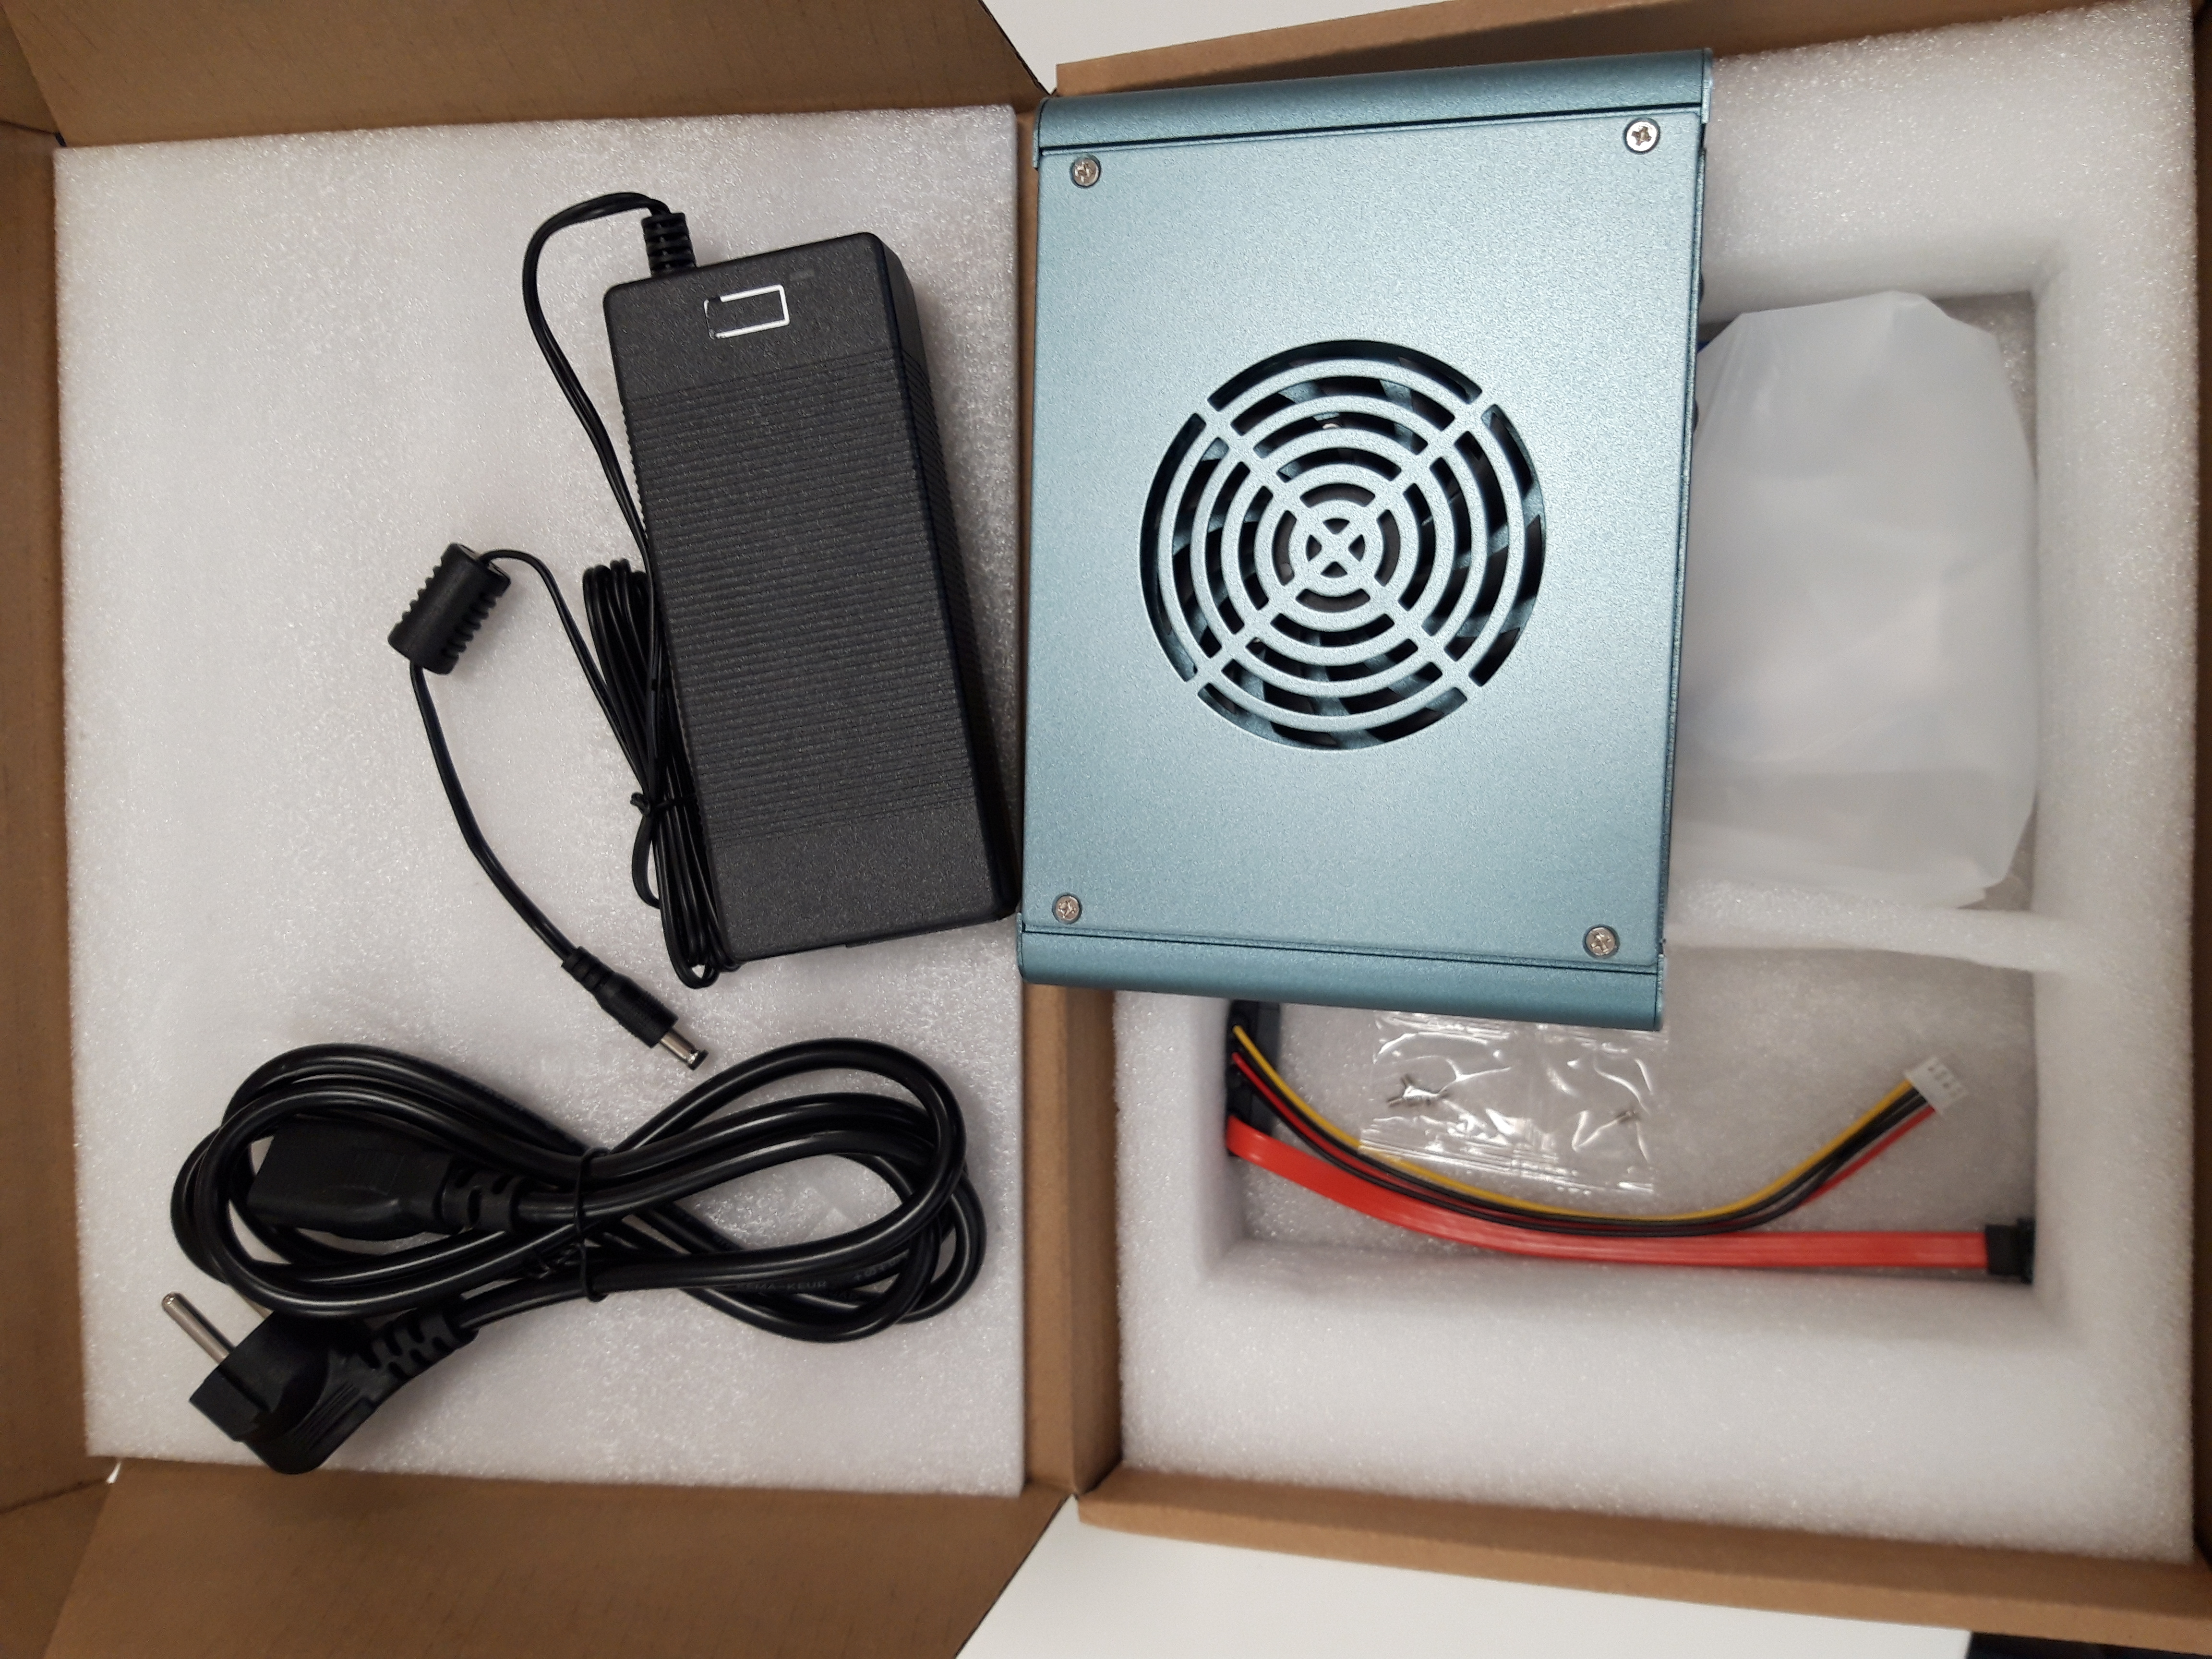
Unboxing
Il firewall è fondamentalmente un mini-pc. E’ dotato di alimentatore esterno, viene fornito un cavo sata per alimentare un secondo disco di tipo 2.5″ (ssd o a rotazione) e le relative viti per il fissaggio. Il secondo disco può essere installato svitando il coperchio alla base del mini-pc e fissandolo sullo stesso. I collegamenti sono semplici e intuitivi.
Primo avvio
Il firewall viene consegnato con preinstallato Pfsense, in questo caso nella versione 2.7. Noi andremo a formattare il firewall per installarci sopra Debian GNU/Linux 12 bookworm

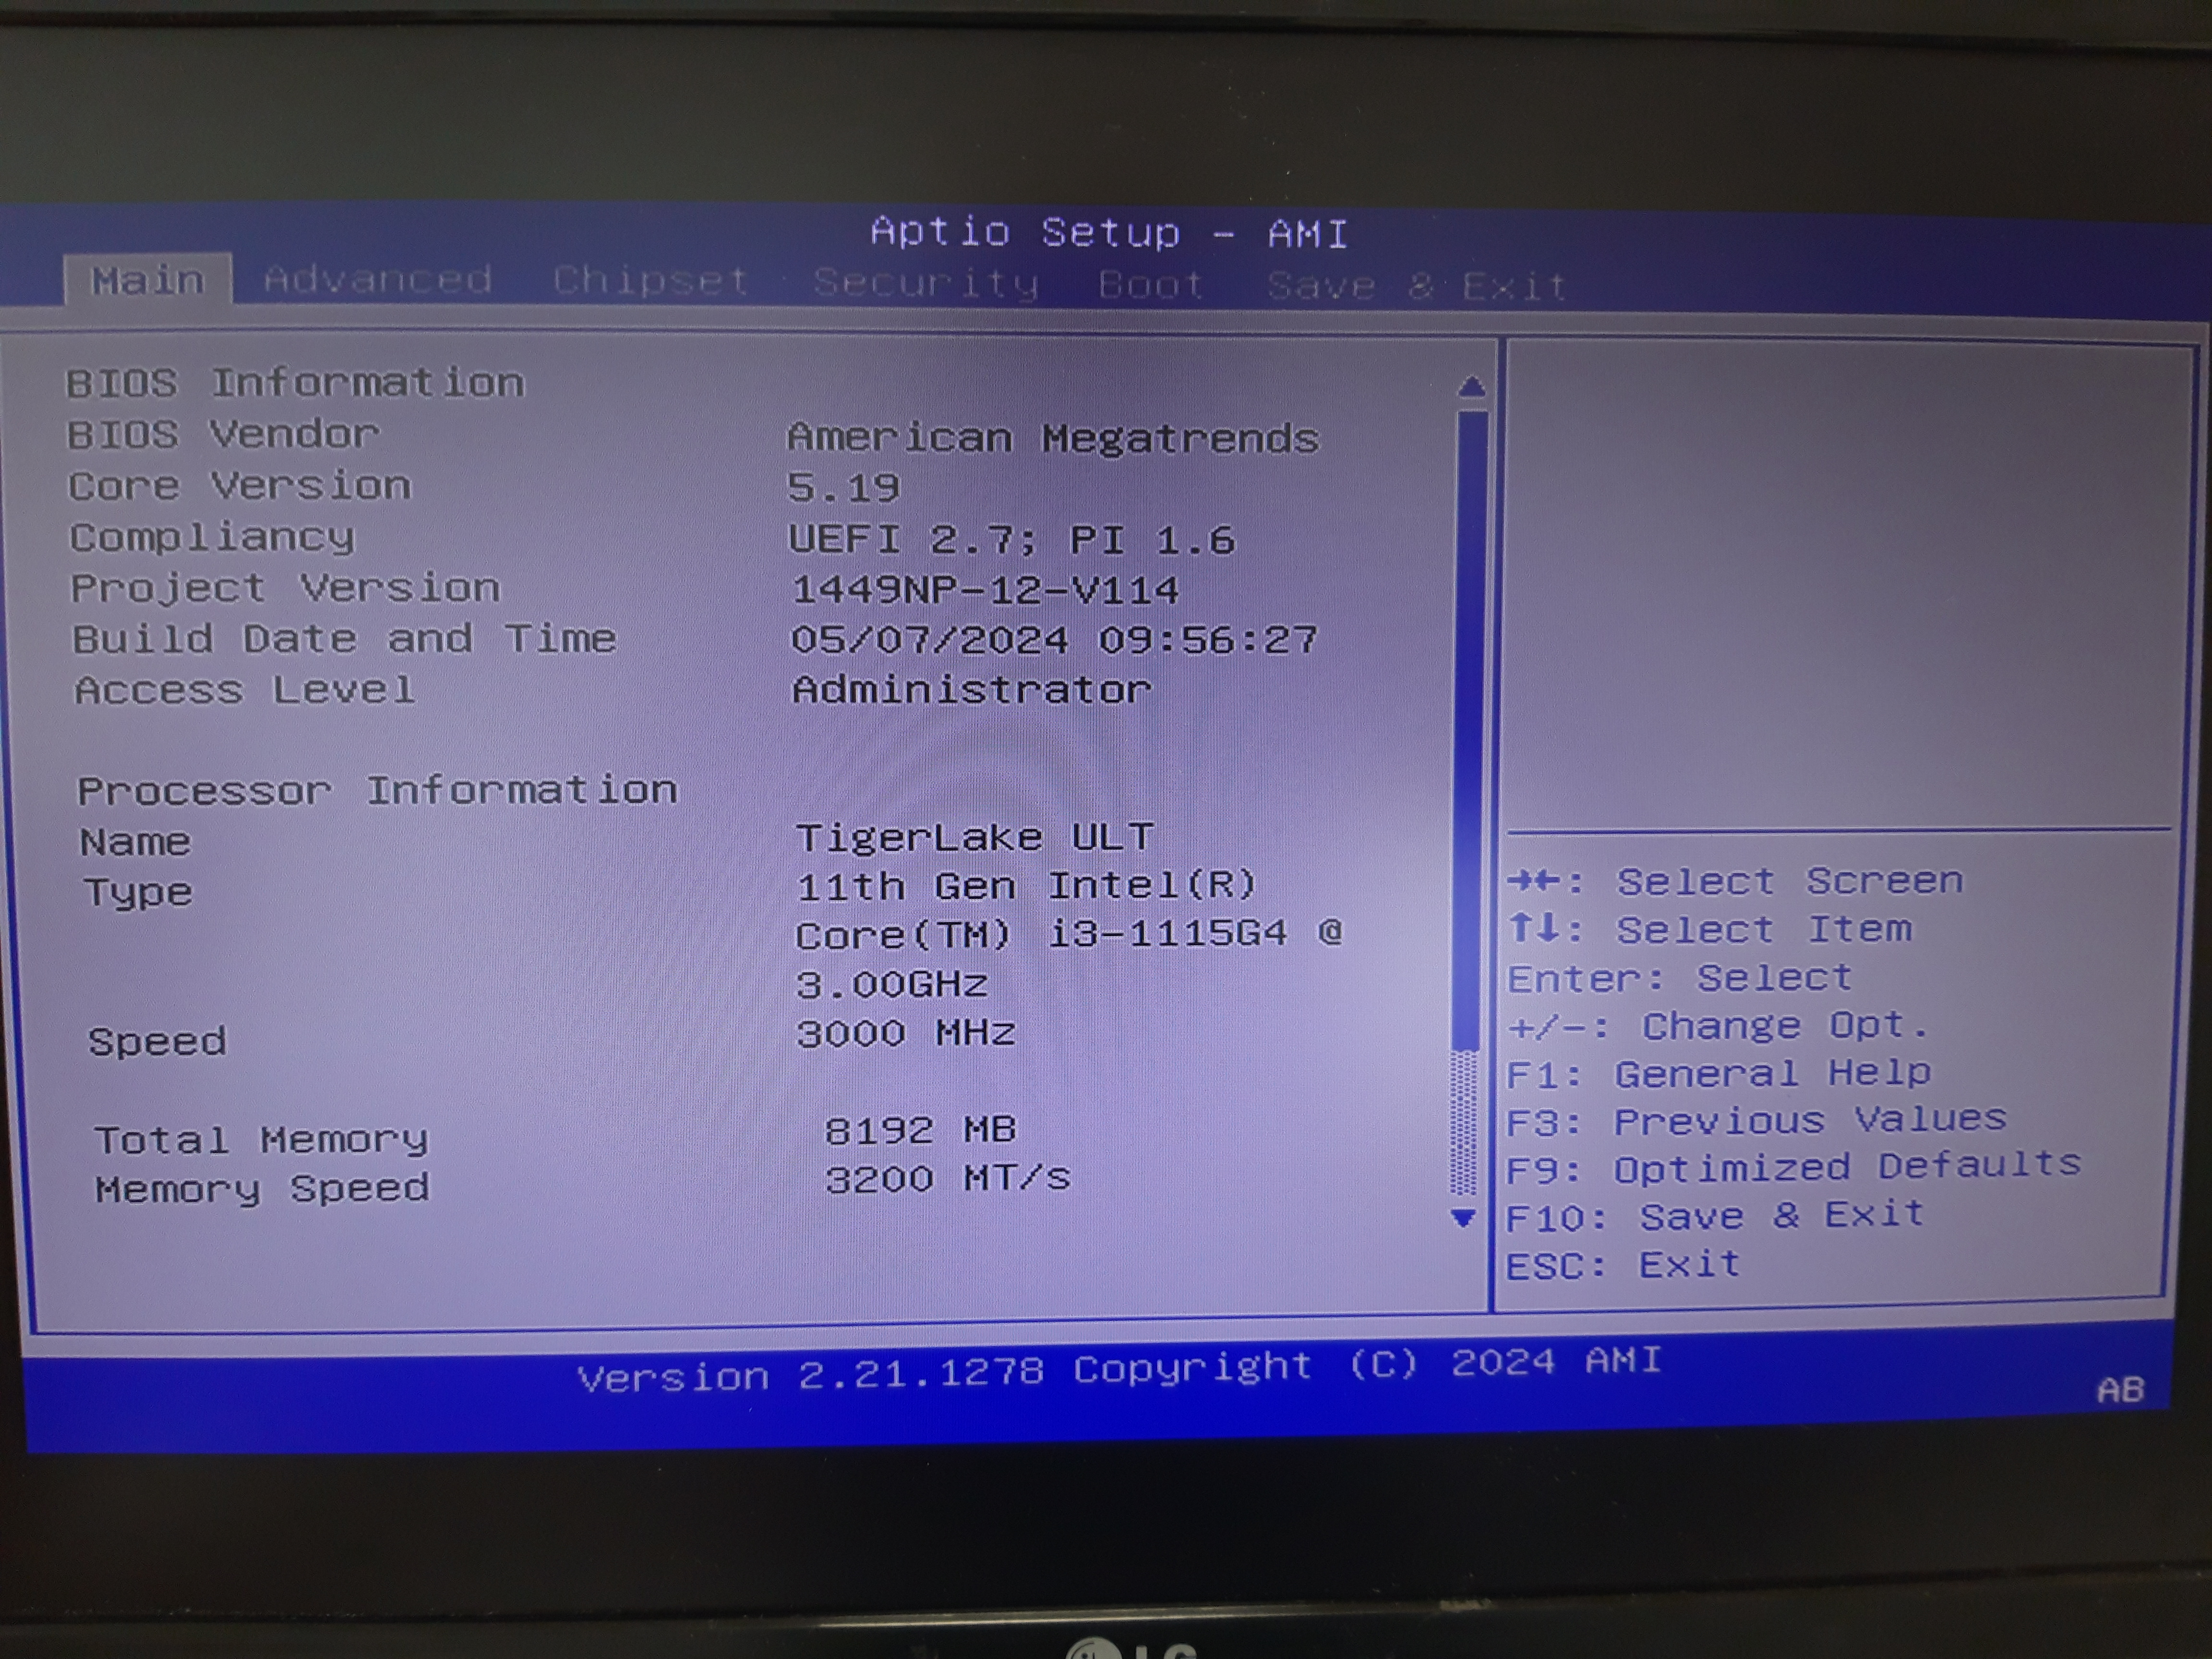
Bios setup
Al boot del mini-pc premendo i tasti <ESC> o <DEL> si accede al bios. Il mini-pc ha il bios American Megatrends, con tantissime impostazioni personalizzabili. Dopo un rapido sguardo a tutte le pagine ho ritenuto opportuno lasciare le impostazioni di default in quanto soddisfacenti per l’uso a cui sarà dedicato.
Installazione Debian
Per installare Debian ho utilizzato la versione 64-bit PC netinst iso prelevabile da https://www.debian.org/distrib/ . Copiata la iso su una pennetta USB, dal bios del sistema ho scelto di fare il boot dalla pennetta USB, modalità EFI. L’installer ha funzionato senza intoppi e non c’è stata necessità di driver di terze parti per far funzionare le 4 schede di rete.
Per poter installare Debian, ho creato una nuova tabella GPT cancellando completamente la precedente.
Successivamente, ho creato 3 partizioni:
- tipo EFI (ESP) di 1 GB
- tipo ext4 per il filesystem di root, da 40GB
- tipo swap di 6GB
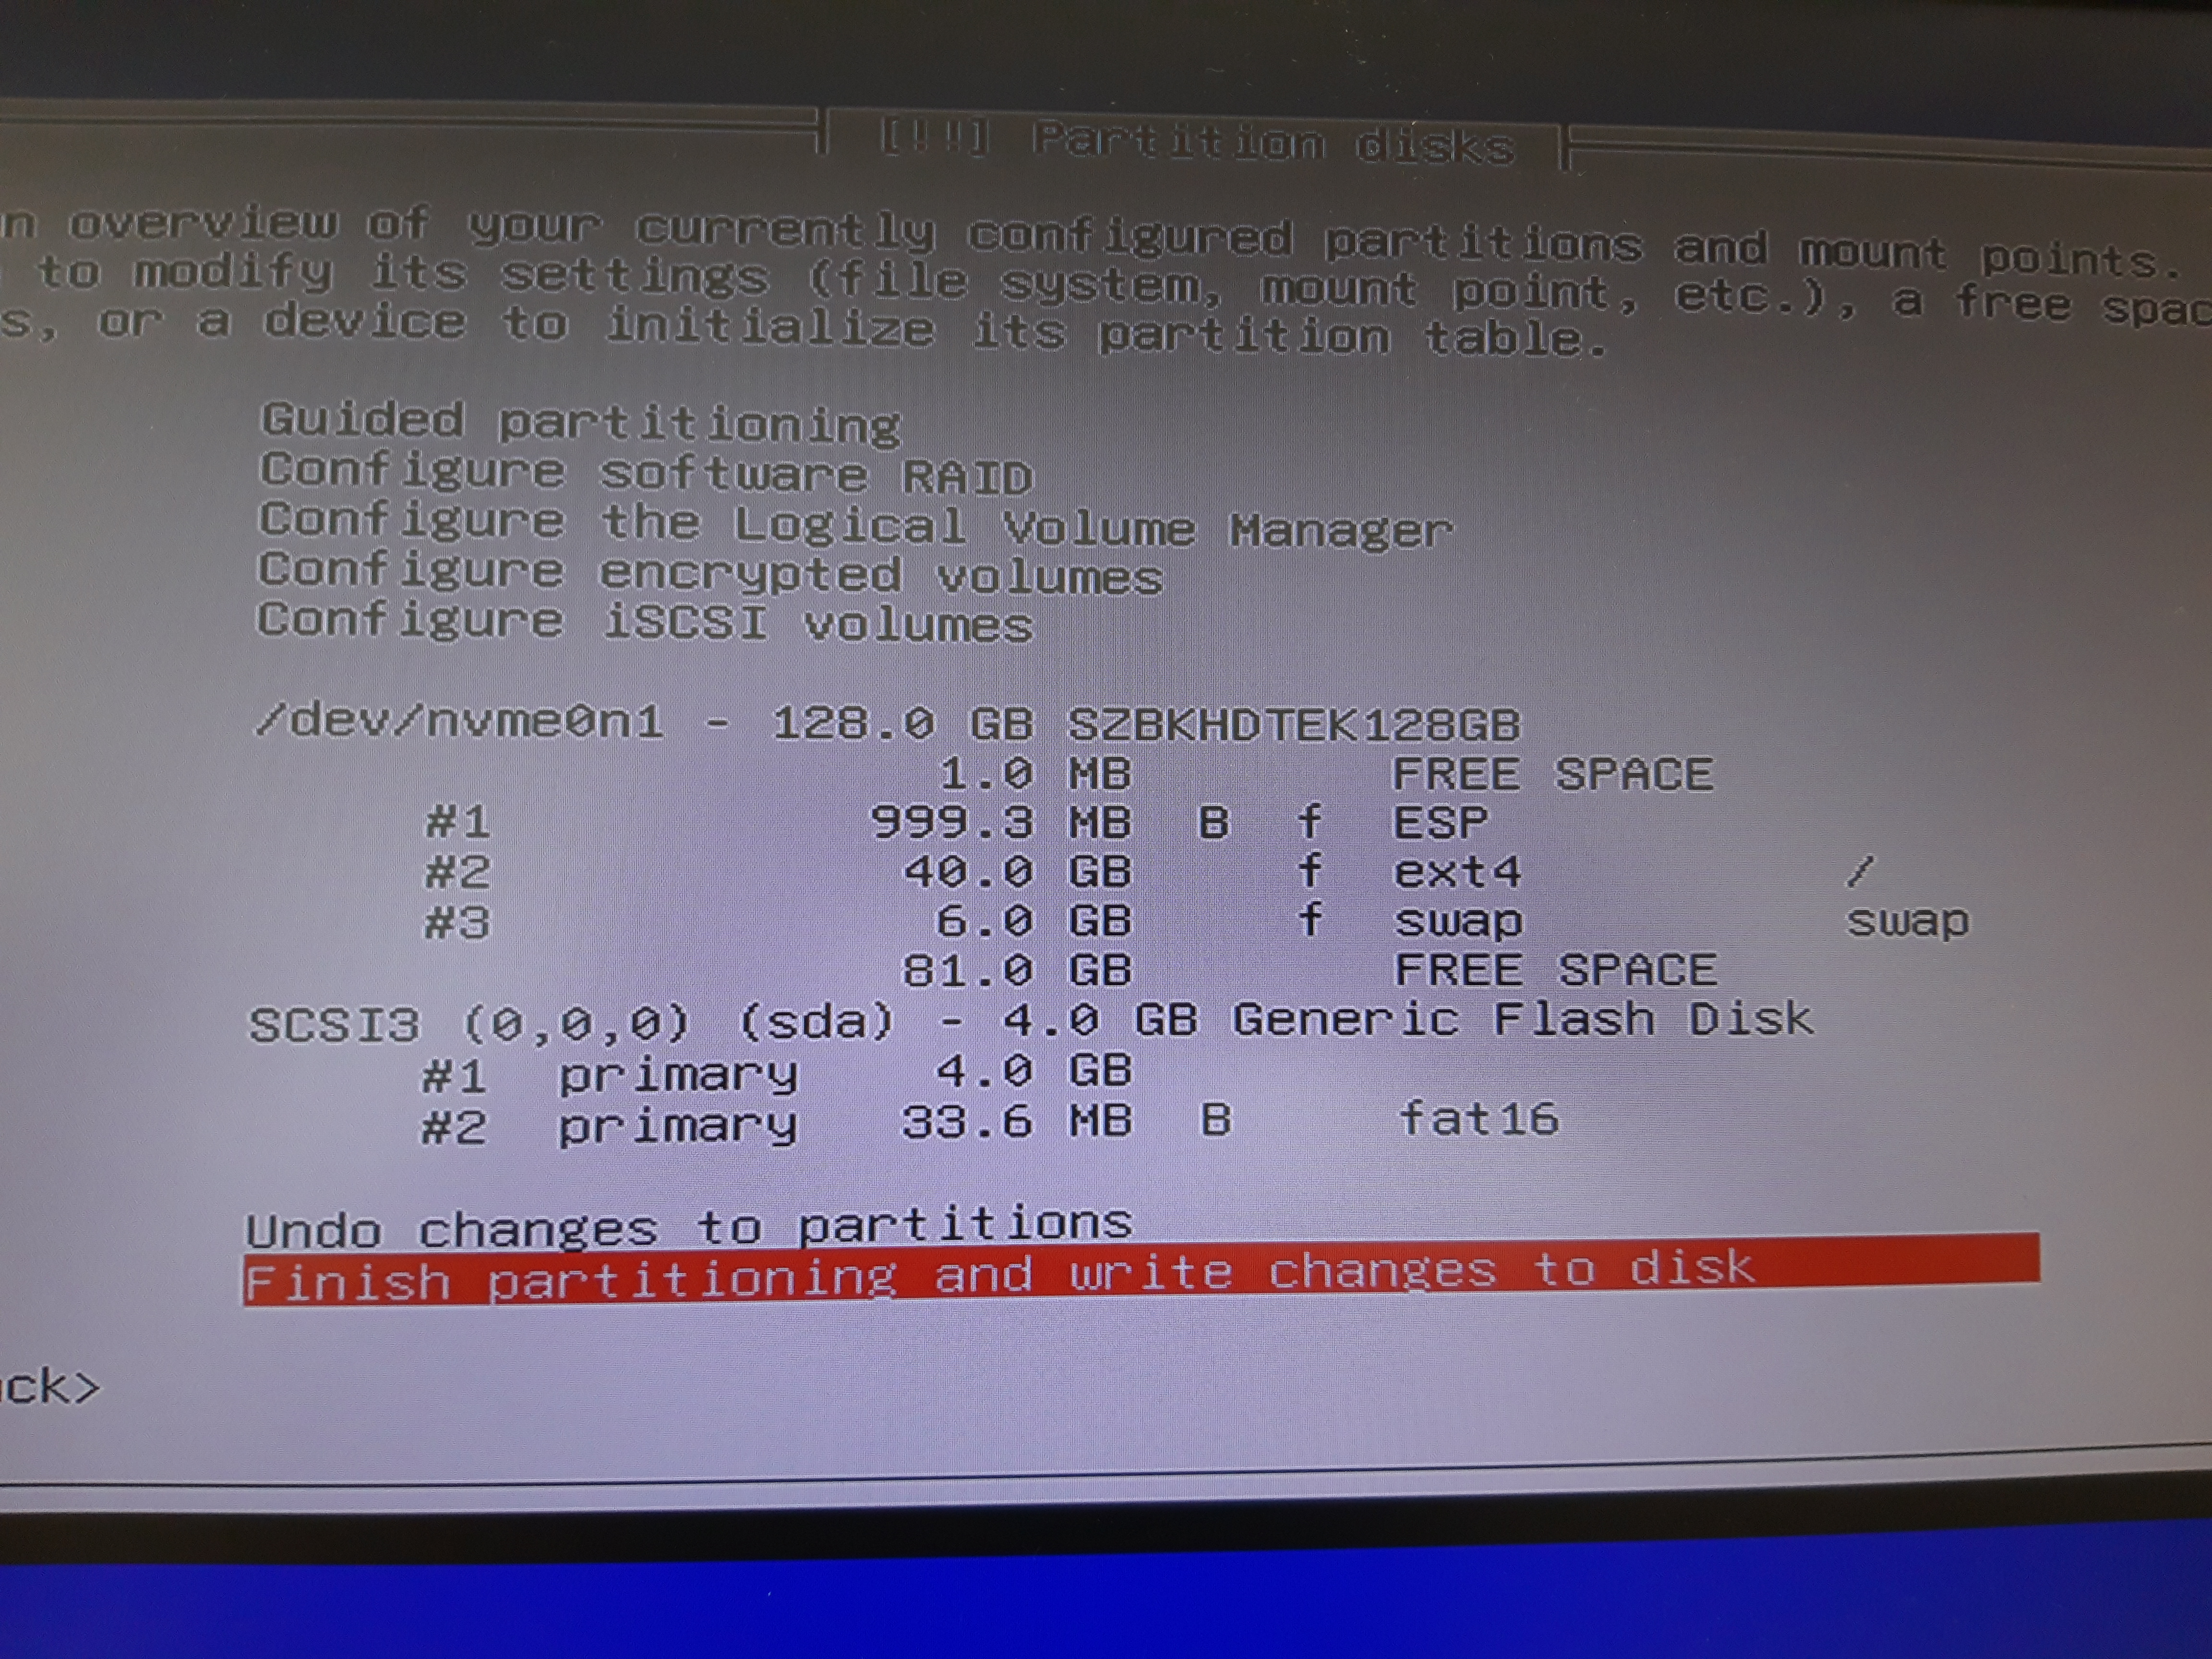
Lasciando libero il resto del disco nvme, così da avere spazio per eventuali impieghi futuri ma anche, per lasciare spazio non partizionato, utile per estendere la vita (in numero di anni) della memoria di archiviazione. Infatti, questo dispositivo dovrà rimanere acceso 24H 7/7 per molti anni consecutivi.
Network configuration
TODO
Errori HW/SW
Il minipc non si sta comportando come dovrebbe. Randomicamente si riavvia da solo.
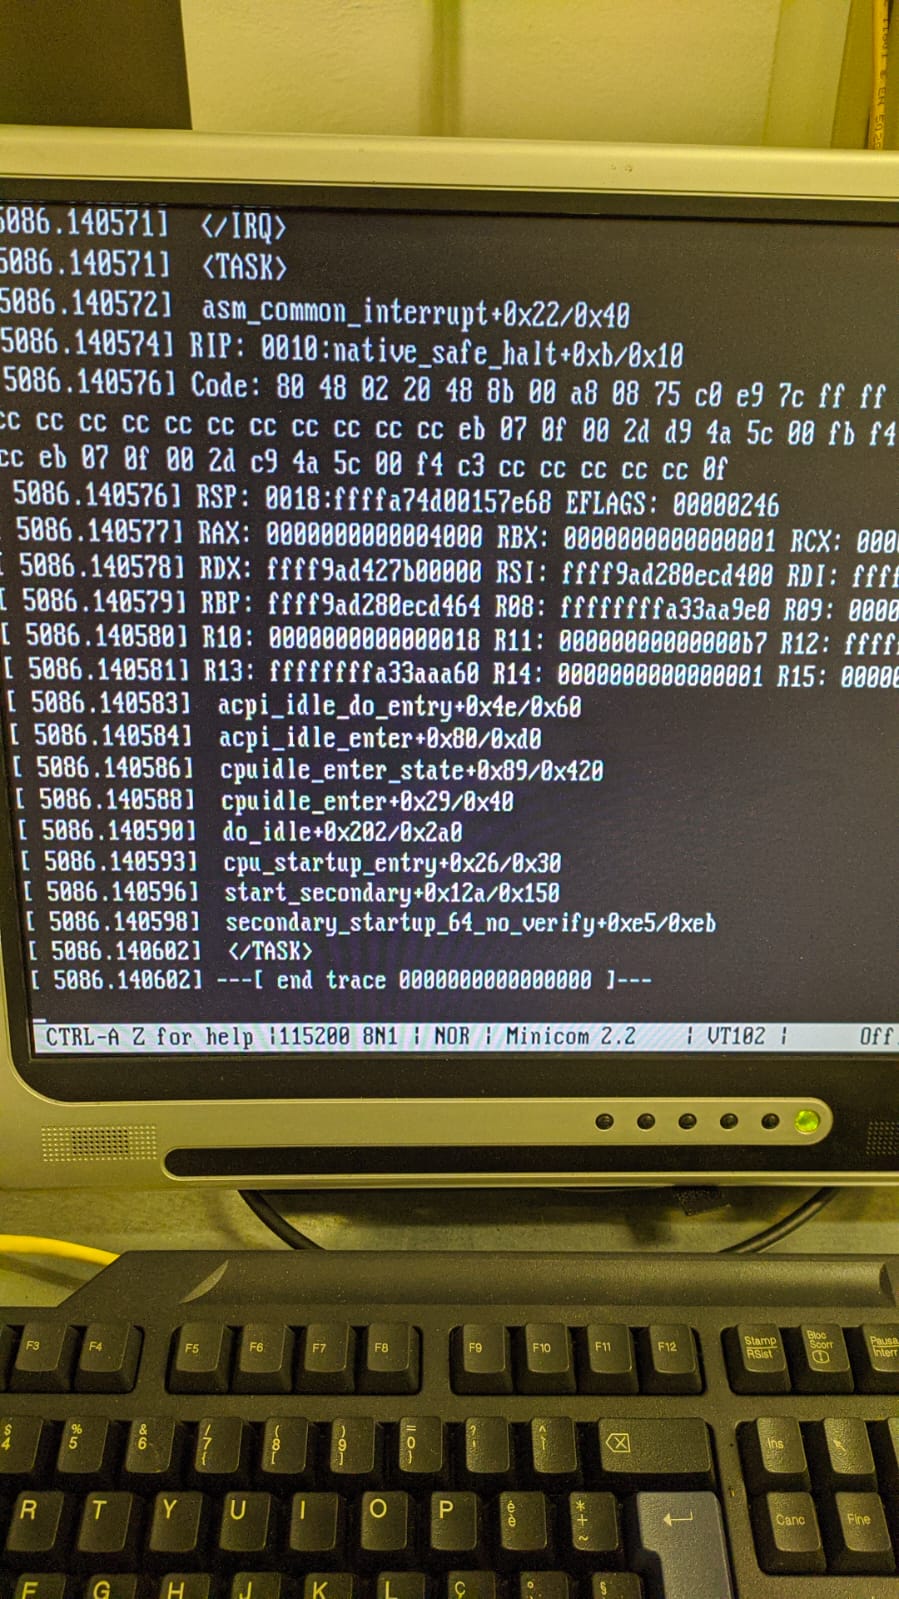
Ho intercettato in figura l’errore durante un reboot, ho chiesto al fornitore il bios aggiornato.
Aggiornato il bios l’errore si ripresenta ancora. Ho quindi sostituito l’NVME fornito con il pc con uno prelevato da un notebook funzionante, e anche sostituito la RAM con una funzionante. Il reboot persiste anche se avviene a distanza di qualche giorno, mentre con l’hardware originale avveniva con frequenza circa oraria.
Dopo numerose interazioni con il produttore del firewall siamo convenuti nel far rientrare il prodotto da loro per ulteriori debug sul posto. La spedizione è stata a carico mio. I tempi sono molto lunghi, sia per il tragitto – a meno che non si decida di spendere più per il trasporto di quanto si è pagato il firewall.
Dopo circa un mese e mezzo il firewall è tornato di nuovo da me, questa volta funzionante e senza nessun riavvio improvviso.
Bene l’assistenza ma male il fatto che ho dovuto provvedere a spese mie al trasporto.
In sostanza a parte il problema hardware, il partaker minipc risulta un ottimo prodotto da usare in molti ambiti oltre a quello cui l’ho destinato io, ovvero come firewall per la mia azienda.